Reversing the Fridge Door: The Missing Steps
Insignia Refrigerator Model NS-RTM18WH2 “Rev A”
I bought a refrigerator that opens on the left (with the hinge on the right), but the kitchen layout needs it to open on the right (hinges on the left). No problem, they make most refrigerator doors reversable. I didn’t need to spend the extra for the delivery crew to swap it.
In retrospect, maybe I should have.
This isn’t the first time I’ve reversed the doors on a refrigerator, but it turns out the manual for this model is missing some critical information. I’m not sure how much of this is specifically because I bought the “Rev A” version rather than the “Rev B” version, but:
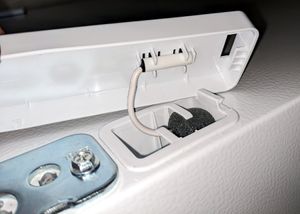
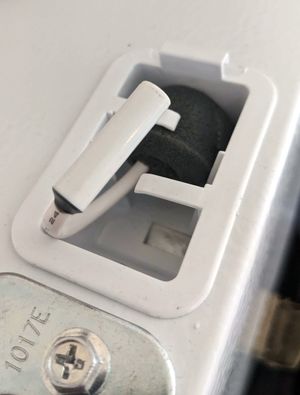
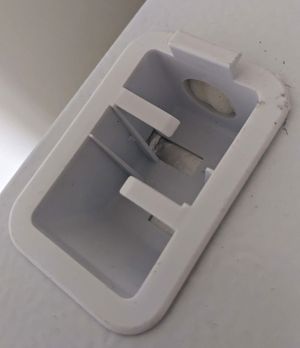
- There is a wire with a small cylinder on the end of it inside the upper hinge assembly. A matching, but empty indentation is on the other side. These aren’t mentioned in the manual at all. It took several calls and emails with customer service, but I was able to verify that the wire can be left in place when moving the hinges to the other side. (I couldn’t get them to tell me what it does, but I’m pretty sure it’s a humidity sensor.)
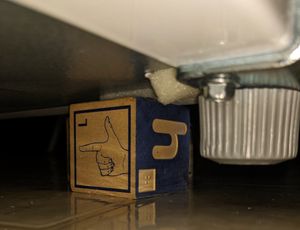
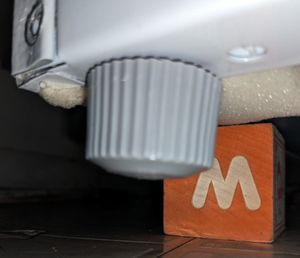
- The bottom hinge assembly not only has the two screws attaching it to the front, but there is a third screw on the bottom, and the foot screws through the bottom plate of the assembly. You have to prop the fridge up on blocks so you can get underneath, remove the screw, and remove both front feet from the refrigerator (they just unscrew). After you reattach the bottom hinge assembly on the other side, including the third screw and the foot, plus reattach the other foot on the other side, you can let it back down onto its feet.
Other than those two things, the instructions in the manual were clear and all the parts needed were in the hinge kit that shipped with the refrigerator.
Notes
You can do most of it with a Phillips screwdriver, but a ratcheting socket wrench is a big help.
Insignia is one of Best Buy’s store brands. Model: NS-RTM18WH2 is an 18 cubic foot refrigerator with a top freezer. Their support page and product information pages link to a “FAQs & Community Discussions” site that isn’t there anymore. Reviews are shared between the Insignia and Best Buy sites, but the customer Q&A section only seems to appear on the Best Buy store listing.
Because the hinges go on the right for a left-opening door and vice versa, it’s easy to get mixed up as to which is the “right hinge kit” and which is the “left hinge kit.”
The manual that came with my unit (version 21-0905) says nothing about “Rev A” or “Rev B.” The PDF you can download from the website is slightly newer (version 22-0512) and indicates that Rev A requires additional parts to switch the door hinges. This turned out not to be the case. All the parts needed were in the kit with the refrigerator.
The Best Buy Q&A system removed all the paragraph breaks from the version of this that I submitted. I’m so glad I only included the key items! Something to remember the next time I want to post there. (Also, I’m kind of annoyed that I can’t link directly to my answer, but at least I can link directly to the question.)