Update March 2023: If you want to cross-post from something supported by brid.gy, I recommend using that service since it’s a lot simpler to set up. But if you want to pull from an RSS/Atom feed, or anything else that brid.gy doesn’t support, or customize features like post visibility, this will let you connect just about anything.
*****IMPORTANT UPDATE NOVEMBER 29, 2022: I gave the wrong directions on what to put in the Application Website field in Mastodon. It just needs to be https://ifttt.com. It isn’t used for identifying the source to your Mastodon server as I thought it was, but appears as a link when the post is viewed by itself on the web. If you followed on my mistake, I highly recommend (1) removing the URL from your Mastodon config and just putting in ifttt.com and (2) going into your Webhooks settings at IFTTT and generating a new key. I feel horrible that I messed this up, and I am so sorry to everyone I steered wrong.
******
I finally managed to hook up IFTTT to Mastodon to auto-post from another site! I use IFTTT as glue for linking several services together including sharing interesting links from Pocket when I’m offline: I can add a tag in the app on my tablet, and then when it syncs that tag up to the cloud, IFTTT will pick it up and create the share post on whichever service I’ve tagged it for.* I also use it to post from RSS and WordPress to publish new blog posts to services that aren’t available in Jetpack.
My main source was this post by @raucao@kosmos.social. It’s a bit out of date, but it pointed me in the right direction.
Note: I’ve updated this article several times (most recently November 2022, when I finally added screenshots and some troubleshooting tips) to add more information, clarify some issues, respond to changes in IFTTT’s layout, and make additional suggestions.
Before we go any further, if you’re hooking up something that’s totally automatic, rather than something triggered by your own actions on another site — especially if you don’t plan on posting to the same account manually — I’d recommend looking for a bot-friendly Mastodon instance like BotsIn.Space. That’s where I set up @SpeedForce@BotsIn.Space to post every time there’s a new blog entry on Speed Force.
1. Set up IFTTT’s Webhooks
On IFTTT, go to Webhooks. Activate it by clicking on the Connect button. Update 2024: As Alan points out in the comments, webhooks is now only available with an IFTTT Pro plan.
2. Set up Mastodon to allow IFTTT as an application
Go to Preferences/Development/Your Applications on your Mastodon instance (ex: on mastodon.social it’s here). Click on New Application. Enter the following:
Name: IFTTT
Website: https://ifttt.com
UPDATE November 2022: When I first posted this article, I thought you only needed maker.ifttt.com to match the source of the API calls. In April/June 2022, I updated the article under the mistaken impression that Mastodon now needed the full URL generated by the IFTTT webhook service, like IFTTT needs the API key from Mastodon. This was wrong. I didn’t test it properly, and didn’t notice that this field isn’t for authentication, it’s exposed in a link when a post is viewed by itself on the web. If you followed on my mistake, I highly recommend (1) removing the URL from your Mastodon config and just putting in ifttt.com and (2) going into your Webhooks settings at IFTTT and generating a new key.
Thank you so much to @h3rb1 for pointing out my mistake.
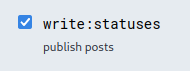
Scopes: write:statuses
Submit the app.
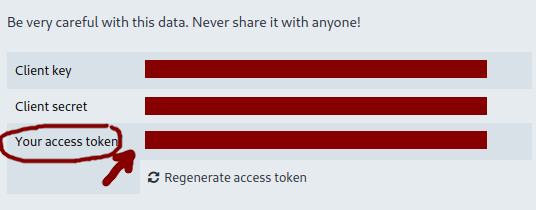
Now open the new app you’ve created and look up the access token for the next step.
3. Create an IFTTT app!
Go back to IFTTT and create a new app. For example, I created an app triggered by Pocket, whenever an item is tagged share-mastodon. You could also set it up to autopost every time you blog with a specific tag, or every new item in an RSS feed, or all kinds of things. Even cross-post from Facebook or “the birdsite” (Twitter).
Since IFTTT has rearranged their site to make it easier to use pre-built recipes — sorry, apps — here are the steps to get to the point where you can build your own.
- Click on the “Get More” button at the top of the IFTTT page.
- The first bar should say “Make more Applets from scratch.” Click on the “IfThisThenThat” button in that bar.
- Click on “This” in “If +This Then That”
- Search for the type of service you want to hook up — RSS for a feed, or Pocket, or Facebook, etc. and choose the type of event you want to use (ex. “New feed item” or “New item tagged…”)
- Enter the info needed for the event — your feed URL, the tags you’re looking for, etc, and click on “Create Trigger.”
- Click on “That” in “If [rss] Then +That”
- Search for Webhooks and click on it.
- Choose “Make a Web Request”
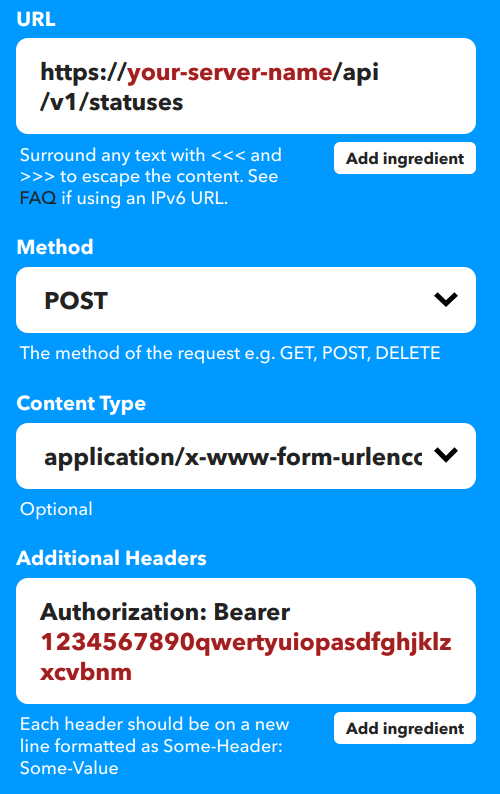
And now you’re ready to configure how IFTTT will actually talk to your Mastodon app. Enter the following settings:
URL: (replace mastodon.example.com with your server)
https://mastodon.example.com/api/v1/statuses
Method:
POST
Content Type:
application/x-www-form-urlencoded
Additional Headers: (replace 1234567890 with the access token you got from Mastodon, and make sure there’s only a space between “Bearer” and the token.)**
Authorization: Bearer 1234567890
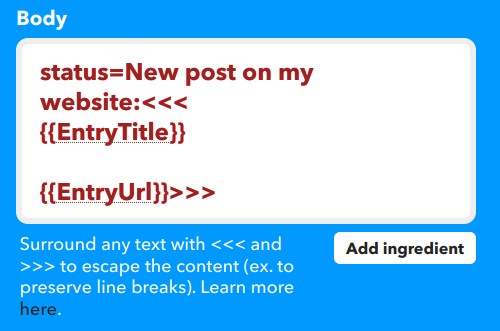
Body:
status=Whatever you want to post
For example, to share a link from Pocket you might want the body to be
status=<<<{{Title}}>>> <<<{{Url}}>>>
Or for posting from WordPress, you might want it to be
status=New blog post: <<<{{PostTitle}}>>>
<<<{{PostUrl}}>>>
Or from an RSS feed, you could use
status=New post: <<<{{EntryTitle}}>>>
<<<{{EntryUrl}}>>>
The “ingredients” available (Title/PostTitle/etc.) will depend on the source you’re using, and you can get them from the IFTTT user interface. RSS feeds will have EntryTitle, EntryUrl, etc., WordPress will have PostTitle and PostUrl, and so on. You can click on the “Add ingredient” button to see what’s available.
Watch out for ampersands and single quotes, because the API handler treats them as separators. Even if they’re in the source material! When I first set this up, I ran into problems where single quotes in the original post would cause the Mastodon post to break. Wrapping the ingredient like this <<<{{Title}}>>> will prevent that.
Be sure to include the status= at the beginning! You can also add optional parameters for the Statuses method of the Mastodon API to add spoiler text, mark it as sensitive content, change the visibility (public, followers-only, etc), and so on.
To post an excerpt in a CW that doesn’t show up in local/federated timelines or hashtag searches, you would do something like this:
spoiler_text=Link: <<<{{Title}}>>>&visibility=unlisted&status=<<<{{Url}}>>> <<<{{Excerpt}}>>>
Or you could auto-generate a private draft, which you can go back to manually and fine-tune using Mastodon’s “Delete and re-draft” feature.
visibility=direct&status=<<<{{Title}}>>> "<<<{{Excerpt}}>>>" <<<{{Url}}>>>
Unfortunately, this method can’t post images because uploading images to Mastodon is a two-step process***. You can use something like brid.gy (Twitter, Instagram, Tumblr, Flickr and more) or moa.party (Twitter/Mastodon). And if you want to go full Rube Goldberg, you can hook up a chain like Instagram→ IFTTT→ Twitter→ Moa→ Mastodon.
Click on “Create action.”
Add a title and click on “Finish.”
4. Test it out!
Go and post something that should trigger the rule, then come back and click “Check Now” on the IFTTT applet. Make sure it comes through the way you want it to. Adjust it as needed, using “Check Now” to verify each change, until it’s working the way you want it.
If you get a 422 Error in the IFTTT logs, that means something in the message body is wrong. Make sure you
- Included
status= - Didn’t post something too long for your instance. (Usually 500 characters)
- Used <<<>>> around any ingredients that might have apostrophes, or ampersands, etc. in them.
If you get a 401 Error in the IFTTT logs, it’s probably an authorization issue. Check that
- Your IFTTT app has the right access token
- There’s only a space and not an actual line break or a double-space between “Bearer” and your token. IFTTT’s narrow layout makes this hard to see because it always wraps, and if you copy the entire line from Mastodon, it’ll sometimes introduce an extra space at the beginning.
- Your Mastodon app config allows write:statuses
Once you’re done, let it go! Over time, IFTTT will adjust its checking frequency based on how often you post to the source feed. I’ve got some that it usually catches within 10 minutes, and others that it takes a few hours.
You can follow me on Mastodon at @kelsonv@wandering.shop. If you’re not on Mastodon, but would like to check it out, start at JoinMastodon.org. It’s a quick overview of what Mastodon is, how it’s different from Twitter, how different instances work (think of them as different servers on an MMO game, or different email services), and how to pick an instance that suits you.
*The day after testing the Pocket-to-Mastodon connection with a few links, I discovered something interesting about IFTTT when it re-posted one of those links to Buffer. Apparently IFTTT doesn’t know which tags are new, only which bookmarks have been updated and what the current tags are. My new Pocket-to-Mastodon applet picked up the share-mastodon tag I’d just added, and my Pocket-to-Buffer applet picked up the old share-buffer tag that had been on there since I first shared it last month.
**Previously the authorization token would be appended to the URL, like this:
https://mastodon.example.com/api/v1/statuses?access_token=1234567890
My recipes using that method still work, but maybe that’s because the tokens are older. (Thanks for the update, Sven!)
***The Mastodon API needs the image to be uploaded first. It sends back the image’s ID, and then you attach that ID when you make the post. Multi-action IFTTT apps aren’t really chains – every action has the same set of ingredients from the trigger, and you can’t add the result from one action to the input on another.
 and Flash") I tried out the
I tried out the